Blog
Welcome to FaceForward
Get the scoop on all things beauty, wellness, and skincare.

Younger and smoother skin – it’s a common concern for women of all ages (and men, even if they don’t talk about it as much). Begin poking around online or asking friends and you’ll find a host of suggestions for anti-aging products and services. Knowing where to begin can be confusing, to say the least.
One anti-aging treatment that’s gained in popularity over the last few years is dermaplaning.
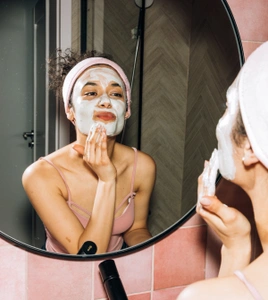
As with a variety of other treatments and practices to improve the skin's appearance, dermaplaning is an ongoing practice. In the past, this method was only available at dermatologist's offices and spas. Fortunately, there are now tools and products that allow you to perform dermaplaning in the comfort of your own home.
Once you learn how to dermaplane at home, you can save time, money… and your skin.
Dermaplaning is basically shaving, though instead of using a traditional razor it uses a painless blade to remove unwanted hair and fuzz while also – and more importantly – removing dead skin cells. Exfoliation by dermaplaning is reported to help with cell regeneration; skincare products can be more effective as they penetrate more easily; and your skin gains a healthy, fresh feel and look.
Exposure to the sun, harsh skincare ingredients, and environmental toxins can all cause skin to break out, appear unexpectedly aged, and get blackheads from dirt and oil build-up. With dermaplaning, exfoliation helps your skin breath, which can help improve a variety of issues:
The results of dermaplaning can lead to smooth and glowing skin with continued, regular use. It’s not only easier to apply makeup, but your skin looks and feels flawless, and because it requires almost no downtime, you can get back to life quickly with no recovery time.
Although most people are good candidates for dermaplaning, this procedure is not recommended for everyone. Individuals who suffer from dull and dry skin as well as those who have minor imperfections are good candidates.
Those who have sensitive skin, active eczema, cold sores, acne or rashes should refrain from dermaplaning, as it could irritate these conditions.
When you get a dermaplane treatment in a professional's office, a sanitized scalpel is usually used. However, there are a number of home options available, and they vary in price and difficulty-of-use. Some are better for beginners, while others are recommended for those with ample dermaplaning experience.
Some experts say you can use a regular razor just as you would for your legs and underarms, though if you use one make sure it’s brand new and has not been used for anything else.
A better option is a tool specifically designed for use on your face.
You can find simple manual dermaplane options just about anywhere these days, and more advanced tools that use a battery to operate can be found online. Some are just for shaving the face, while others come with an attachment for eyebrow shaping. As with many things, you get what you pay for: going with a high-quality product is recommended for better (and safer) results. Shop around and see what makes sense for your experience level and budget.
Other items you need include cleanser, rubbing alcohol, serum, and moisturizer.
Although dermaplaning is generally safe and has few side effects, it’s important to follow directions precisely to avoid complications such as infection or, worse, damage and scarring.
To begin, your face needs to be free of dirt and oil. Use a gentle cleanser or soap and water to clean your skin, especially if your face seems greasy due to products you’re using. Apply some rubbing alcohol to the blade of your dermaplaning tool as well. Dry your face thoroughly before starting.
It’s a good idea to test your tool on another part of your body before moving to your face. Make sure you feel comfortable with the blade and action before beginning on your facial skin.
When you use the razor tool on your face, make sure you pull the skin taut and hold the tool at a 45-degree angle. Start at the upper part of the cheekbone and make small strokes in a downward motion. This ensures the blade does not move against the direction of hair growth.
Once you’re finished with the first area, move on to another, following the same technique. Work on the sides of the face near the eyes and then move to the forehead. Make sure you get to all areas of the face while avoiding the sides of the nose, hairline and eyelids. You do not need to use much pressure, as you’re just removing fine hairs and the outer layer of skin.
Once you’re finished, there will probably be some leftover hair and residue on the skin's surface. Use a warm towel to clean all of the debris off. Keep in mind that your skin will be extra sensitive after the dermaplaning procedure, so use a gentle hand while removing everything.
Along with being sensitive, your skin will be extra dry after this kind of exfoliation. Immediately after dermaplaning, apply a gentle hydrating serum. After you allow the serum to penetrate the skin, use a moisturizer all over your face.
No downtime is needed after the dermaplaning procedure, but there are some care instructions you need to follow to properly take care of your skin:
As with shaving other areas of your body, your facial hair will continue to come back, and after the new layer of skin appears, it will eventually get dull and dry again. This is why dermaplaning is generally an ongoing practice, which is another reason to learn how to do it home. After the first procedure, it’s recommended you wait three weeks to a month before doing it again. After that, most people dermaplane every four to six weeks.
Dermaplaning is one way to remove dead skin cells and refresh the face's appearance. However, there are numerous other options that may be easier and feel less invasive. If taking a blade to your face isn’t something you feel comfortable doing, there are other exfoliation procedures you can do at home.
Nava MD’s prescription treatments can help. Our online dermatology visits are designed to get you a customized prescription skin regimen shipped to your door, if appropriate, that’s been formulated specifically for your skin.
Get started now and find out the best treatment plan for your complexion.
This article is intended for informational purposes only and should not be considered medical advice.
Consult a healthcare professional or call a doctor in the case of a medical emergency
Acids for your face?! Here's the difference between azelaic acid and salicylic acid for healthy, glowing skin.
Read more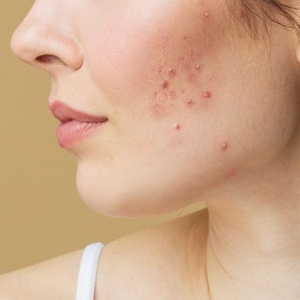
Some acne medications can lead to skin sensitivity initially, an indication they're working. But if your skin reacts badly, here's what to do.
Read more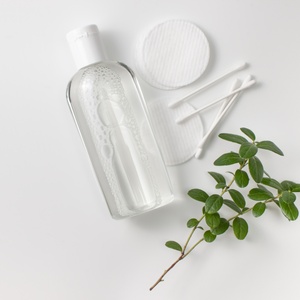
If you haven't heard about micellar water (pronounced my-sell-er) , put that face wipe down and get ready to give your skin some love.
Read more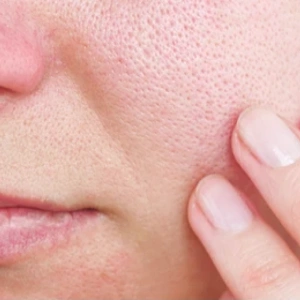
If you're wondering why you have large pores or whether there's anything you can do about it, genetics and lifestyle factors both play a role.
Read more